How to manage themes using the cPanel WordPress Toolkit
This article describes how to quickly and easily manage your WordPress themes using the WordPress Toolkit in cPanel. The WordPress Toolkit provides a convenient, easy-to-use interface directly within cPanel that you can use to install, configure, and manage your WordPress themes.
Table of Contents
Installing WordPress themes
To install themes for your WordPress site using the WordPress Toolkit, follow these steps:
- Log in to cPanel.If you do not know how to log in to your cPanel account, please see this article.
- Open WordPress Toolkit:
- If you are using the Jupiter theme, on the Tools page, in the Domains section, click WordPress Toolkit:

If you are using the Paper Lantern theme, in the DOMAINS section of the cPanel home page, click WordPress Toolkit:

- If you are using the Jupiter theme, on the Tools page, in the Domains section, click WordPress Toolkit:
The WordPress Toolkit page appears with a list of installed WordPress sites. In a site list entry, click the Themes tab:
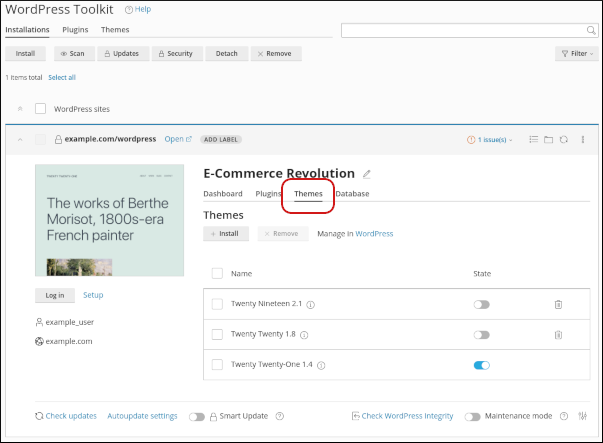
A list of installed themes for the site appears:
To install a new theme on the site, click Install. A list of themes appears:
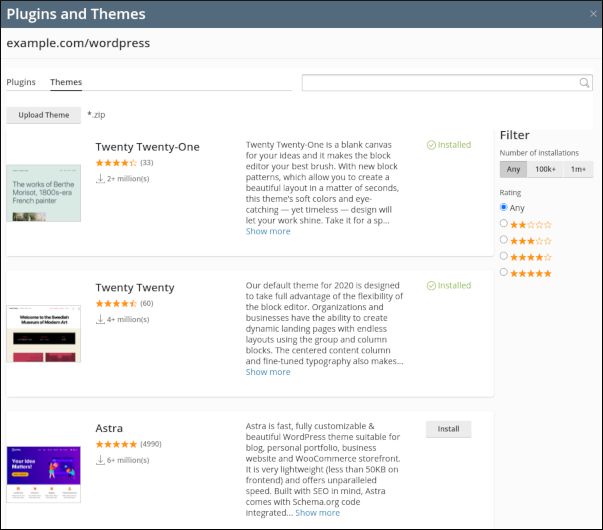
Select a theme, and then click Install.
You can use the search box and Filter sidebar options to refine the list and search for a specific theme.- At the top right corner of the Plugins and Themes dialog box, click the X icon. To manage your installed themes, see the following procedure.
Managing WordPress themes
To manage themes that you have installed using the WordPress Toolkit, follow these steps:
- Log in to cPanel.If you do not know how to log in to your cPanel account, please see this article.
- Open WordPress Toolkit:
- If you are using the Jupiter theme, on the Tools page, in the Domains section, click WordPress Toolkit:
If you are using the Paper Lantern theme, in the DOMAINS section of the cPanel home page, click WordPress Toolkit:
- If you are using the Jupiter theme, on the Tools page, in the Domains section, click WordPress Toolkit:
The WordPress Toolkit page appears with a list of installed WordPress sites. In a site list entry, click the Themes tab:
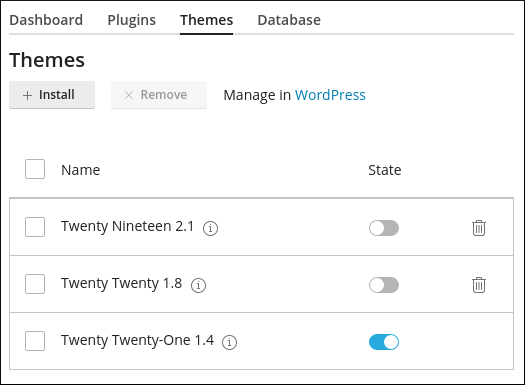
A list of installed themes for the site appears with several options:
- To manage installed themes from the WordPress dashboard, click Manage in WordPress.
- To enable or disable a theme, click the slider in the State column.
- If there are updates available for a theme, click Updates, select the theme, and then click Update to update it.
- To remove (uninstall) a theme, click the trash can icon. Alternatively, you can remove multiple themes at once by selecting the check boxes, and then clicking Remove.
More Information
- For more information about WordPress Toolkit, please visit https://www.cpanel.net/wp-toolkit.
- For more information about WordPress, please visit https://wordpress.org.
Article Details
- Control Panel: cPanel
- Level: Beginner
Related Articles
- Installing WordPress with the cPanel WordPress Toolkit
- Managing WordPress with the cPanel WordPress Toolkit
- Managing plugins with the cPanel WordPress Toolkit
- Changing the WordPress theme manually
- Disabling and deleting WordPress themes
- Installing WordPress themes
- Staging WordPress with the cPanel WordPress Toolkit
Grow Your Web Business
Subscribe to receive weekly cutting edge tips, strategies, and news you need to grow your web business.
No charge. Unsubscribe anytime.
Did you find this article helpful? Then you'll love our support. Experience the A2 Hosting difference today and get a pre-secured, pre-optimized website. Check out our web hosting plans today.